Replace Jeep control arms by lifting the Jeep, removing fasteners, and installing new arms with correct torque.
I’ve spent years turning wrenches on Jeeps, from weekend trail rigs to daily drivers. This guide explains how to replace Jeep control arms step by step, with clear tools, safety tips, alignment notes, and mistakes I’ve learned the hard way. Read on to get confident, safe results whether you’re doing one arm or both.
Why replace Jeep control arms?
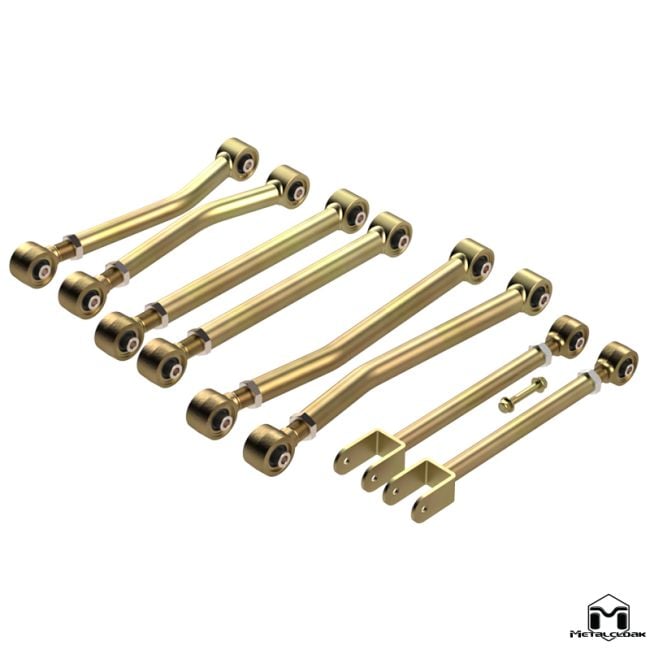
Control arms link the wheel hub to the frame. When they wear, ride quality and steering feel suffer. Replacing control arms restores correct suspension geometry and keeps tires wearing evenly.
Common causes of failure include age, torn bushings, bent ball joints, and trail damage. Symptoms can be subtle at first, so acting early saves money and prevents extra damage. Replacing control arms is a core maintenance task for Jeep owners who want safe handling.

Signs your Jeep needs new control arms
Watch for these signs that tell you how to replace Jeep control arms might be necessary:
- Uneven or rapid tire wear.
- Clunking or knocking over bumps.
- Steering wander or poor return to center.
- Visible torn bushings or rusted ball joints.
If you see any of these, inspect the control arms. A quick road test and visual check often confirm the problem. Early detection makes the actual replacement faster and cheaper.

Tools and parts you’ll need
Before you start learning how to replace Jeep control arms, gather the right gear:
- Jack and strong jack stands rated for your Jeep.
- Socket and wrench set, including deep sockets.
- Torque wrench for final fasteners.
- Ball joint separator or pickle fork.
- Pry bar and hammer.
- Replacement control arms (OE or aftermarket).
- New bolts, nuts, and cotter pins if required.
- Penetrating oil and anti-seize compound.
Having the right parts and hardware saves time. Double-check torque specs for your model in the service manual or on the parts box. I always replace mounting bolts when they show any corrosion.

Preparing the Jeep: safety and setup
Safety matters when you learn how to replace Jeep control arms. Work on a flat surface and chock the wheels. Loosen the lug nuts slightly before lifting.
Raise the Jeep with a floor jack and support it securely on jack stands under the frame. Remove the wheel to access the control arm. Take photos of the stock setup to help during reassembly. Proper preparation avoids injury and keeps the job smooth.

How to replace Jeep control arms: step-by-step
Follow these steps to replace Jeep control arms safely and correctly:
-
Support the axle or knuckle
-
Use a jack or stand under the axle or steering knuckle. This prevents sudden drops when you release control arm fasteners.
-
Remove stabilizer links and sway bar attachments
-
Unbolt any sway bar end links or brackets that connect to the control arm. Keep hardware organized.
-
Disconnect the ball joint
-
Remove the nut from the ball joint stud. Use a ball joint separator or a pickle fork to free the joint. Be careful not to damage the stud threads.
-
Unbolt the control arm mount bolts
-
Spray penetrating oil if bolts are rusty. Remove the frame-to-arm bolts and any brackets. Some models have two bolts at the frame; support the arm while removing them.
-
Remove the old control arm
-
Pry the arm free and slide it out. Compare the old arm to the new one for orientation and length.
-
Prep the new control arm
-
Transfer any brackets or clips from the old arm if needed. Lightly coat bolt threads with anti-seize or assembly lube.
-
Install the new control arm
-
Position the new arm and loosely thread the frame bolts and ball joint nut. Do not torque yet until the vehicle is at ride height unless the manufacturer requires otherwise.
-
Tighten and torque fasteners
-
Lower the axle or bring the suspension to normal ride height. Torque frame bolts and ball joint nut to factory specs using a torque wrench. Install new cotter pins where applicable.
-
Reattach sway bar and other components
-
Reconnect sway bar links and any sensors. Ensure all brackets are secure.
-
Reinstall the wheel, lower the Jeep, and torque lug nuts
-
Lower the vehicle fully and torque lug nuts to spec. Do a visual check of the work.
-
Test drive and check for issues
-
Drive slowly at first and listen for clunks. After 50–100 miles, re-check all fasteners and torque settings.
I follow this routine on my own Jeeps. On one trail trip I learned to always support the knuckle; the axle dropped once and bent an extra brake line. That mistake taught me to double-check support before removing bolts.

Alignment, torque specs, and final checks
After you learn how to replace Jeep control arms, alignment is crucial. Changing control arms alters toe and camber. Get a professional alignment right away. Driving even a short distance with incorrect alignment causes tire wear and poor handling.
Torque specs vary by model and year. Always use factory torque specs from the service manual. If you don’t have access, the parts supplier or repair guides list these values. I keep a small notebook in the garage with torque specs for my fleet.

Common mistakes to avoid
Avoid these pitfalls when you replace control arms:
- Reusing worn bolts and nuts when torque and stretch matter.
- Torquing fasteners with the suspension unloaded unless instructed by the manual.
- Skipping alignment after replacing arms.
- Ignoring related worn parts such as ball joints, tie rods, or bushings.
A careful approach saves time and money later. I once swapped only the control arms and later had to replace tires early because I skipped alignment. Don’t repeat that.

Cost, time, and when to hire a pro
Typical costs and timeframes for how to replace Jeep control arms:
- Parts cost range: affordable to mid-range depending on brand and whether you buy OE or aftermarket.
- Labor time: 1.5 to 3 hours per side for an experienced DIYer; longer for novices.
- Professional shop: expect labor charges plus alignment fee.
Hire a pro if you lack tools, a safe workspace, or confidence handling suspension components. A shop ensures correct torque and immediate alignment. For complex lift kits or custom setups, professional help is wise.
My personal tips and lessons learned
From my years working on Jeeps, these tips help:
- Mark old bolt orientation and replace bolts when in doubt.
- Keep parts and fasteners labeled in small bags.
- Use thread locker where recommended.
- Take pictures at each step; they are lifesavers during reassembly.
One lesson I learned: never skip the post-install torque re-check. Fasteners can settle after the first drive. A quick re-torque prevents loose parts and keeps you safe.
Quick Q&A (short answers within the guide)
These small answers help clear common doubts about how to replace Jeep control arms:
- How long does one replacement take? Expect 1.5 to 3 hours per side for an experienced DIYer. Beginners may take longer.
- Can I reuse control arm bolts? Replace bolts if they are stretch-type or show corrosion. New hardware ensures correct clamping.
- Is alignment required? Yes, alignment is required after replacing control arms to restore proper geometry.
Frequently Asked Questions of how to replace jeep control arms
What are the signs of a failing control arm?
Signs include clunking noises, uneven tire wear, steering drift, and loose steering feel. Visual checks may show torn bushings or ball joint play.
Do I need special tools to replace control arms?
Basic tools, a ball joint separator, and a torque wrench cover most jobs. Some vehicles may need impact tools or press tools for stubborn parts.
Can I do this job at home safely?
Yes, with a flat surface, quality jack stands, the right tools, and safety precautions it’s doable. If you’re unsure, a shop is a safer option.
How soon should I get an alignment after replacing control arms?
Get an alignment immediately after installation and before driving long distances. Driving even a few miles with misaligned wheels can cause rapid tire wear.
Will replacing control arms improve ride quality?
Yes, new control arms restore correct geometry and reduce clunking or sloppy steering. If other suspension parts are worn, those should be addressed too.
Conclusion
Replacing control arms is a high-impact repair that restores handling, safety, and tire life. Follow the step-by-step process, use the right tools, and get an alignment to finish the job correctly. Start with careful preparation, take steady steps, and don’t hesitate to ask a pro for help when needed. If this guide helped, try the steps on your Jeep, subscribe for more repair tips, or leave a comment with your experience.